6.2: The Area of a Parallelogram
- Page ID
- 34147

In parallelogram \(ABCD\) of Figure \(\PageIndex{1}\), side \(AB\) is called the base and the line segment \(DE\) is called the height or altitude. The base may be any side of the parallelogram, though it is usually chosen to be the side on which the parallelogram appears to be resting. The height is a line drawn perpendicular to the base from the opposite side.
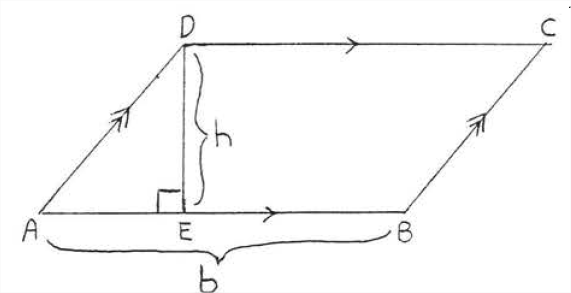
The are of a parallelogram is equal to its base times its height.
\[A = bh\]
- Proof
-
Draw \(BF\) and \(CF\) as shown in Figure \(\PageIndex{2}\). \(\angle A=\angle CBF\), \(\angle AED=\angle F=90^{\circ},\) and \(AD=BC\). Therefore \(\triangle ADE \cong \triangle BCF\) and the area of \(\triangle ADE\) equals the area of \(\triangle BCF\). We have:
\[\begin{array} {rcl} {\text{Area of parallelogram } ABCD} & = & {\text{Area of } \triangle ADE + \text{ Area of trapezoid } BCDE} \\ {} & = & {\text{Area of } \triangle BCF + \text{ Area of trapezoid } BCDE} \\ {} & = & {\text{Area of rectangle } CDEF} \\ {} & = & {bh.} \end{array}\]
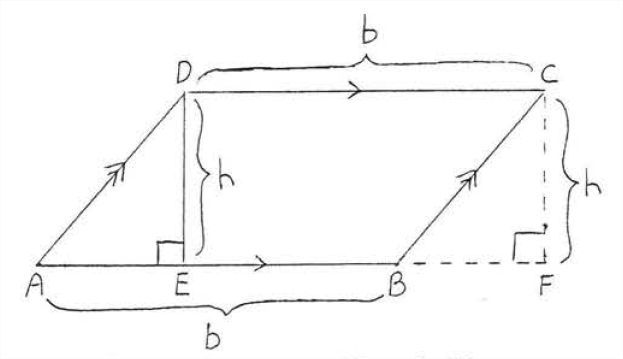
Figure \(\PageIndex{2}\): Draw \(BF\) and \(CF\).
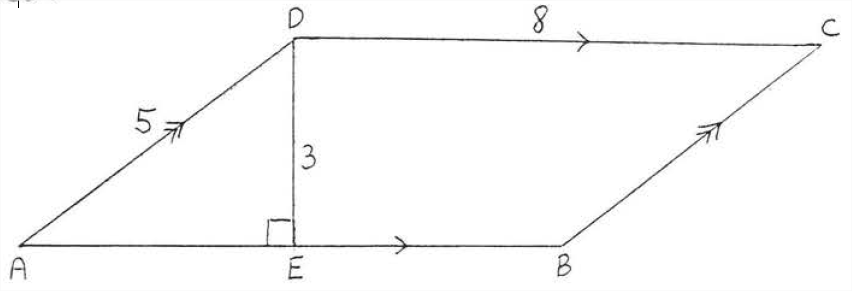
Find the area and perimeter of \(ABCD\):
Solution
\(b = AB = CD = 8\), \(h = 3\). \(\text{Area } = bh = (8)(3) = 24\). \(AB = CD=8\). \(BC = AD =5\). Perimeter = 8 + 8 + 5 + 5 = 26.
Answer:
Area = 24, Perimeter = 26.
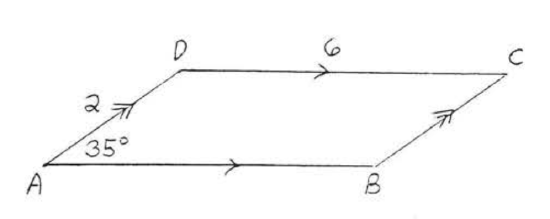
Find the area and perimeter of \(ABCD\):
Solution
Apply the Pythagorean theorem to right triangle \(ADE\):
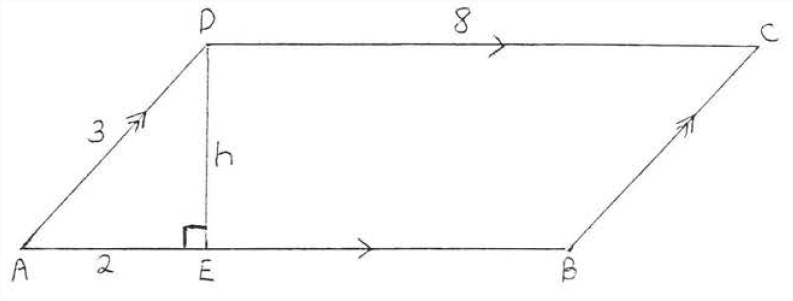
\[\begin{array} {rcl} {\text{AE}^2 + \text{DE}^2} & = & {\text{AD}^2} \\ {2^2 + h^2} & = & {3^2} \\ {4 + h^2} & = & {9} \\ {h^2} & = & {5} \\ {h} & = & {\sqrt{5}} \end{array}\]
Area = \(bh = (8)(\sqrt{5}) = 8\sqrt{5}\)
Perimeter \(=8+8+3+3=22\)
Answer: \(A = 8 \sqrt{5}, P = 22\).
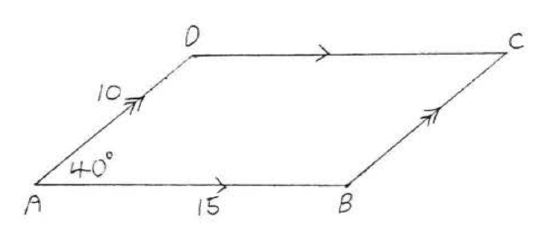
Find the area and perimeter to the nearest tenth

Solution
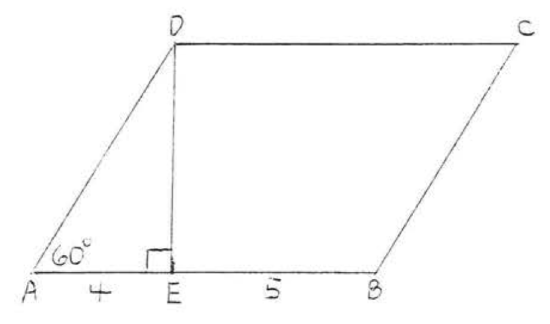
To find the area we must first find the height \(h\) (Figure \(\PageIndex{3}\)), Using trigonometry
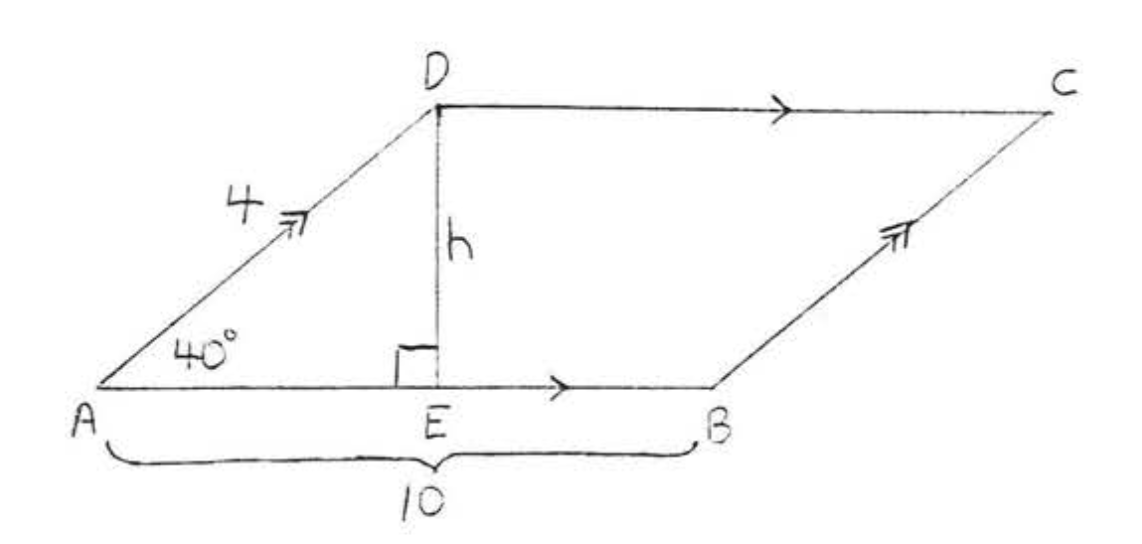
\(\begin{array} {rcl} {\sin 40^{\circ}} & = & {\dfrac{h}{4}} \\ {(4) .6428} & = & {\dfrac{h}{\cancel{4}} (\cancel{4})} \\ {2.5712} & = & {h} \end{array}\)
Area = \(bh = (10)(2.5712) = 25.712 - 25.7\)
Perimeter = 10 + 10 + 4 + 4 = 28.
Answer
\(A = 25.7\), \(P = 28\).
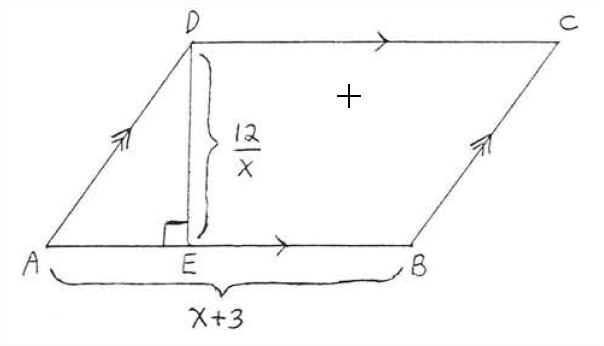
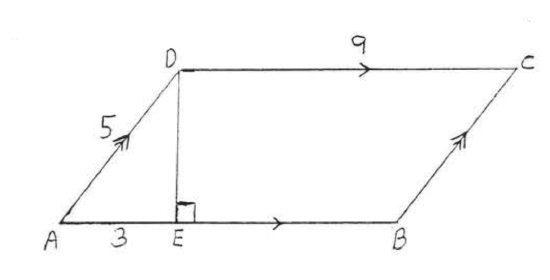
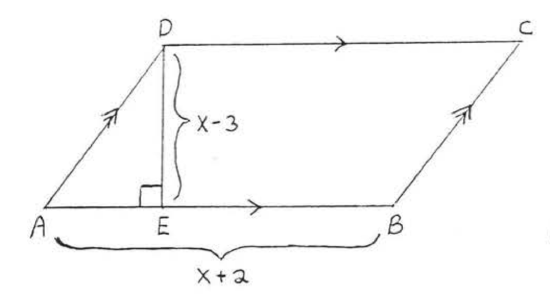
Find \(x\) if the area is 21.
Solution
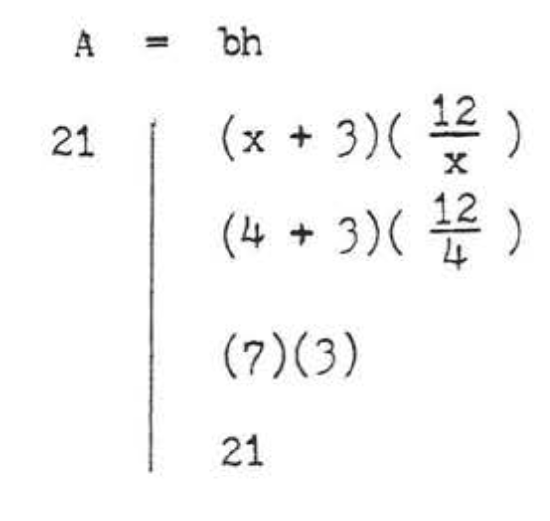
\[\begin{array} {rcl} {A} & = & {bh} \\ {21} & = & {(x + 3)(\dfrac{12}{x})} \\ {(x)21} & = & {(x + 3)(\dfrac{12}{\cancel{x}})(\cancel{x})} \\ {21x} & = & {12x + 36} \\ {9x} & = & {36} \\ {x} & = & {4} \end{array}\]
Check:
Answer
\(x = 4\).
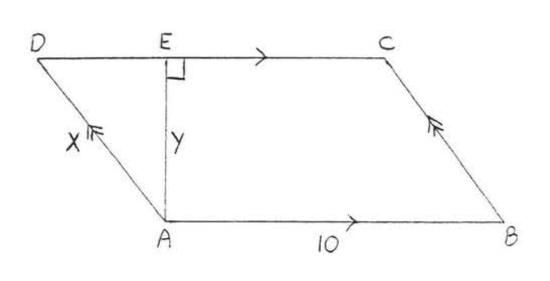
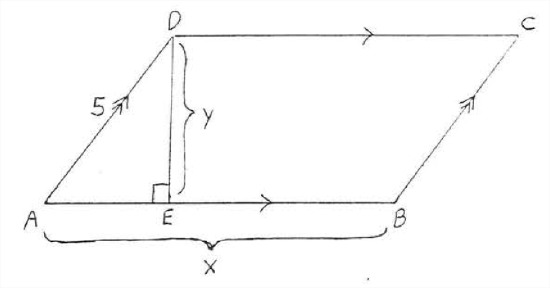
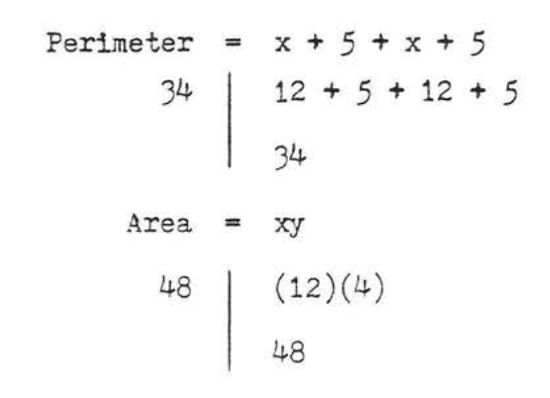
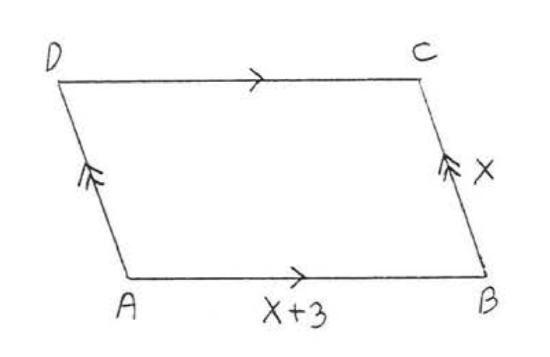
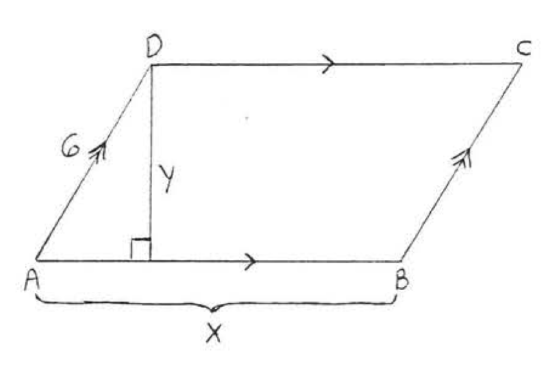
The area of parallelogram \(ABCD\) is 48 and the perimeter is 34. Find \(x\) and \(y\):
Solution
\[\begin{array} {rcl} {\text{Perimeter}} & = & {AB +BC+CD+DA} \\ {34} & = & {x + 5 + x+5} \\ {34} & = & {2x+10} \\ {24} & = & {2x} \\ {12} & = & {x} \\ {\text{Area}} & = & {xy} \\ {48} & = & {12y} \\ {4} & = & {y} \end{array}\]
Check:
Answer
\(x = 12, y = 4\)
Problems
1 - 4. Find the area and perimeter of \(ABCD\)
1.

2.
3.
4.
5 - 6. Find the area and perimeter to the nearest tenth:
5.
6.
7 - 8. Find the area and perimeter. Leave answers in simplest radical form:
7.
8.
9. Find \(x\) if the area of \(ABCD\) is 36:
10. Find \(x\) if the area of \(ABCD\) is 72:

11. Find \(x\) if the perimeter is 22:
12. Find \(x\) if the perimeter is 40:
13. The area of \(ABCD\) is 40 and the perimeter is 28. Find \(x\) and \(y\):
14. The area of \(ABCD\) is 40 and the perimeter is 30. Find \(x\) and \(y\):