
5.4: How to Measure With Micrometer


- Last updated
- Apr 6, 2020
- Save as PDF
( \newcommand{\kernel}{\mathrm{null}\,}\)
A micrometer is an essential tool for taking precise measurements. It has a precision of 0.01 mm and if you ever aspire to make something with tight tolerance you will probably need to use it. We will have a look at how to use a traditional analog micrometer and how to read the dimension correctly.
In the video, I am showing how to take the measurement and also talking a little bit about how the micrometer is made. So this could be helpful for understanding this device a little better.
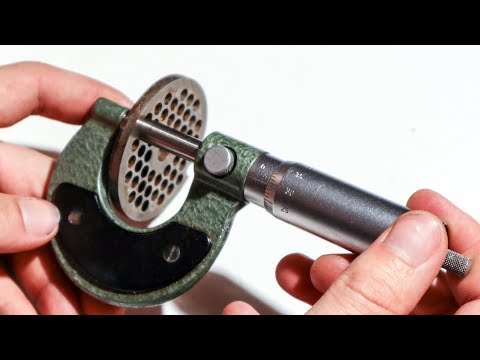
Video: In this video, we are looking at a micrometer. This is a device for taking precise measurements. It has a precision of 0,01 mm and is essential in any machine shop. I am quickly showing how it is built and how it works as well as how to take a measurement with it. I hope this is helpful.
Supplies:
- Micrometer
- Part to measure
Step 1: Take the Measurement

- Place your part between the measuring faces.
- Bring the measuring face towards the part by rotating the spindle.
- When you are close use rachet to press the measuring face against the part. You should achieve sufficient measuring force by rotating the rachet two or three times around.
- Now you can lock the dimension using the locking nut.
Step 2: Reading the Linear Graduation


Read the linear graduation. :)
The number of lines on the top of the horizontal zero line tells you the millimeters. We can see 4 lines for this measurement. Meaning our measurement is over 4 mm.
Lines under the horizontal zero line show us the half-millimeters. When you can not see the half-millimeter line it means that your dimension is between 4.0 and 4.5 mm. If we can see the half mm line, it means that the dimension is between 4.5 and 5 mm.
Step 3: Reading the Thimble Graduation


This graduation shows you the tenths and hundreds of a millimeter. It is divided into 50 graduations. There fore each graduation equals 0.01 mm. We will simply have a look at which graduation lines up with the horizontal zero line. For this part, we can see that the number is 29. Because we can not see the half-millimeter line we just add this number to 4.0 mm. Therefore our final dimension is 4.29 mm.
If on the other hand, we could see the half mm line, we would add this number to 4.5 mm and the result would be 4.79 mm.
Step 4: Final Tips
Reading the micrometer can be tricky when you are not used to it. To mitigate any reading error, it is helpful to take a rougher measurement with calipers first to see what dimension you are aiming for.
If you want to practice reading a micrometer then here is a pretty sweet micrometer simulator.