
26.5: A.5- Using the table


- Last updated
- May 2, 2022
- Save as PDF

( \newcommand{\kernel}{\mathrm{null}\,}\)
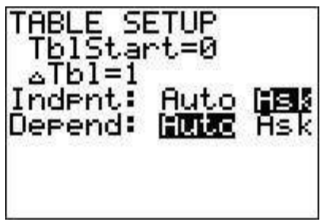
The table (2ndgraph) is useful as it gives a table representation of a function (from the y= screen). Make sure there is a function typed in the Y1 postion and look at the table. If you want to know the value of the function for particular values of x then we must use the ’TBLSET’ screen. Press 2ndwindow. Move the cursor to the ’Indpnt’ line then to the right to highlight ask and press enter.
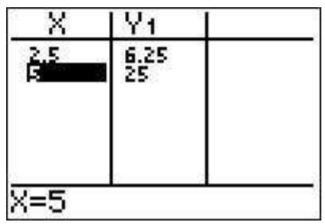
Go back to the table 2ndgraph. Now your table is empty. Evaluate your function at 2.5 by typing 2.5 and pressing enter. You will see the value of the function in Y1 at 2.5 in the table now. You can evaluate at any number of points.
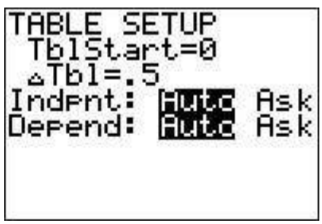
You can also evaluate at every half integer starting at −1 for example by going to the ’TBLSET’ screen (2ndwindow) changing ’TblStart’ to (-)1and ΔTbl=.5. Also change the ‘Indpnt’ setting to ‘Auto’ again.
View the table (2ndgraph) to see what happened.